 Axe API
Development Kit
In this section, we will provide all the information about how you can set up your development environment.
- You will learn
- What is the development kit?
- How you can run the `axe-api` package in your machine?
- How to install dev-kit?
Fork the repository
You must fork the axe-api repository to your GitHub account first.
TIP
You can use the Fork a repo docs of GitHub.
WARNING
You don't need to fork the repository if you are a core team member.
Clone repository
You can clone the repository via your command line.
$ git clone git@github.com:{GITHUB_USERNAME}/axe-api.gitWARNING
You should change the {GITHUB_USERNAME} with your GitHub username.
You can use git@github.com:axe-api/axe-api.git SSH URL if you are a core team member.
Install dev-kit
Axe API provides built-in dev-kit scripts to manage your development environment.
You can use the following command in the root directory of the repository you cloned.
$ npm install
$ npm i -g knex typescript ts-node-dev
$ npm run dev-kit:install
You should be able to see the following message in your termianl;
$ dev-kit has been installed.Run the dev-kit
It means that you are ready to execute the dev-kit in your local machine if you did not get any errors.
You can use the following command to run dev-kit;
$ npm run dev-kitYou should be able to see the following screen if everything goes correctly.
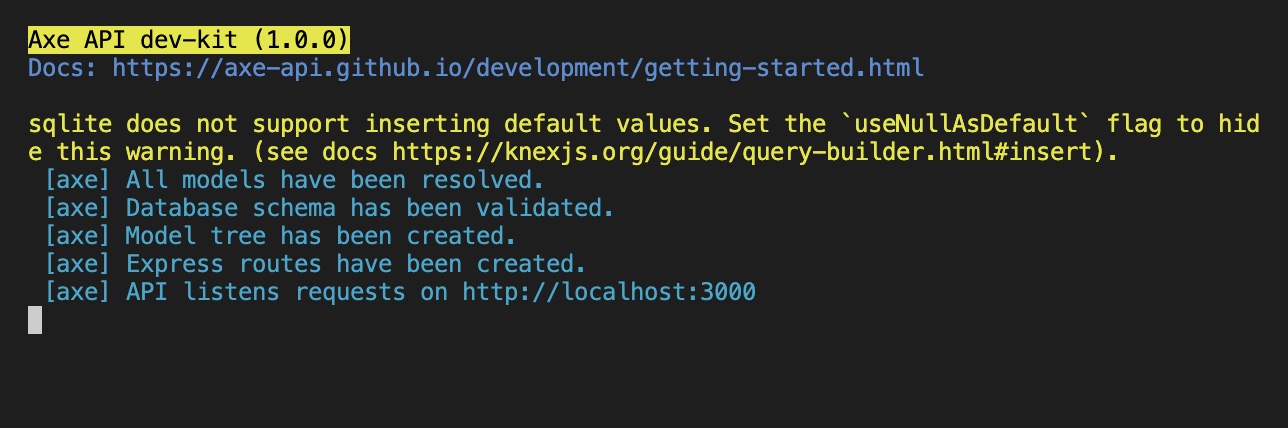
This message shows that your dev-kit API is running and it is ready to handle your API requests.
TIP
Whenever you change anything in the code, your dev-kit application would be compiled again.
Directory Structure
The installation scripts adds some folders and files to the axe-api project when you install dev-kit to your project. These files and folders actually represent a real Rest API application that uses axe-api.
Let's see the following folder structure in your axe-api project after you installed the dev-kit.
.
├── dev-kit
  ├── app
    ├── v1
      ├── Config
      ├── Events
      ├── Hooks
      ├── Models
      ├── init.ts
      ├── config.ts
    ├── config.ts
  ├── migrations
    ├── 20210509145612_User.js
  ├── knexfile.js
  ├── mydb.sqlite
├── src
├── index.ts
├── dev-kit.ts
├── ...
index.ts
This file is the main file of the axe-api package. You will need to touch this file only if you need to export more types.
dev-kit.ts
This file is the initial point of dev-kit. This file has been executing when you run the npm run dev-kit command. Basically, it creates an Axe API application which is located in the dev-kit folder by using the axe-api framework files.
Usually, you don't need to change this file.
dev-kit directory
In this folder, you have a Rest API structure that uses Axe API as a framework. You can change all files in this folder by your requirements.
For example; you can add a new model structure to test your Axe API changes. Your dev-kit application will be refreshed when you change the dev-kit folder.
src directory
This folder contains all of the core framework codes. It means that you are working on the core structure if you are changing a file in the folder.
Your dev-kit application will be refreshed when you change a file in the src folder.
Remove dev-kit
You can remove the dev-kit helpers whenever you want. Just execute the following command to remove dev-kit installation.
$ npm run dev-kit:removeTIP
All of dev-kit files and folders have been added to the .gitignore file. You don't need to delete the dev-kit from your repository ever. You will not send your dev-kit files to the main axe-api projects.
Next steps
In this section, we've explained what is the development kit and how you can use it.
In the following section, we are going to talk about how you can manage your development databases.